How To Effectively Troubleshoot M1 and M2 macOS Ventura Wi-Fi Issues

[ad_1]
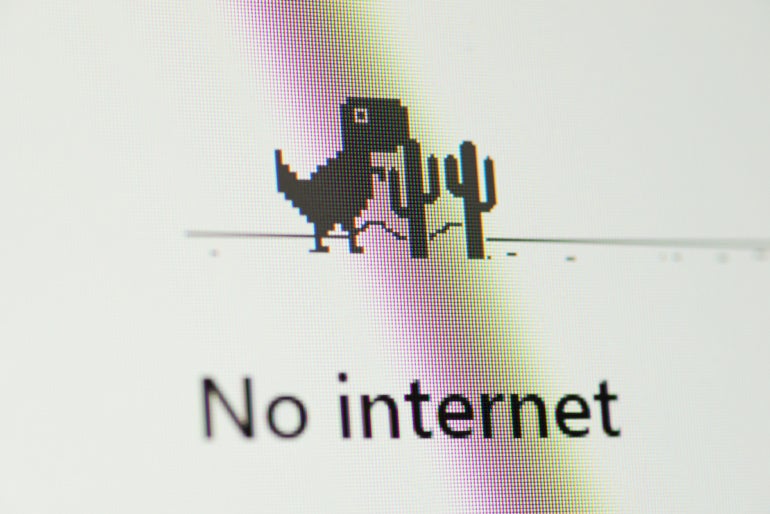
Standard interconnected technologies ordinarily do the job so perfectly that I’m stunned now when a thing basically fails. This is primarily true when working with Apple systems, but I started going through difficulty with my M1-run Mac’s Wi-Fi connectivity in January.
It turns out I wasn’t by itself. Many M1- and M2-run Mac customers running macOS Ventura have reported challenges remaining appropriately linked to Wi-Fi networks. I say “remaining thoroughly connected” for the reason that my Mac (and those of many others) continued to suggest the computer was connected to the Wi-Fi network, but e-mail, World wide web connectivity, Teams sessions and other cloud solutions all unsuccessful.
Digging into Wi-Fi network setting information uncovered the IP address assigned to the Mac frequently changed from a legitimate routable LAN address to the infamous 169.254.x.y handle, the Automated Non-public IP Addressing value assigned when an handle isn’t available or gained through DHCP. The 169.254.x.y address, of class, is not adequately routable — as a result the failures.
Sad to say, just disabling and re-enabling Wi-Fi did not correct the challenge. Neither did renewing the DHCP lease take care of the error. In my expertise and assessments, only rebooting the Mac preset the concern. Even then, rebooting only solved the mistake for an hour or so, just after which the dilemma generally recurred.
Intriguingly, I do not encounter the Wi-Fi problem when connected to my office’s wireless community, nor do I have any difficulties applying my M1-driven iPad. The error only occurs with my M1 MacBook Pro when connected to my home’s mesh network. Added investigation surfaced a variety of potential explanations, including the way in which beamforming and mesh networks function, but I didn’t purchase that response, as my office’s wireless network gear leverages the identical technologies devoid of difficulties.
Leap to:
How to repair M1 and M2 macOS Ventura Wi-Fi connectivity
Update your variation of macOS
A number of sources condition updating macOS to the newest release, which is macOS Ventura variation 13.2 at the time of this composing, will take care of the issue. The particular M1/M2 Wi-Fi trouble looks to have surfaced with the launch of macOS Ventura in late Oct 2022.
To obtain and install offered macOS updates, open up Method Options, click on Standard and then choose Software package Update. macOS will report regardless of whether updates are offered: If so, clicking the presented button begins the updating method.
Alternatively, you might see the concept revealed in Figure A confirming your Mac is up-to-day.
Figure A
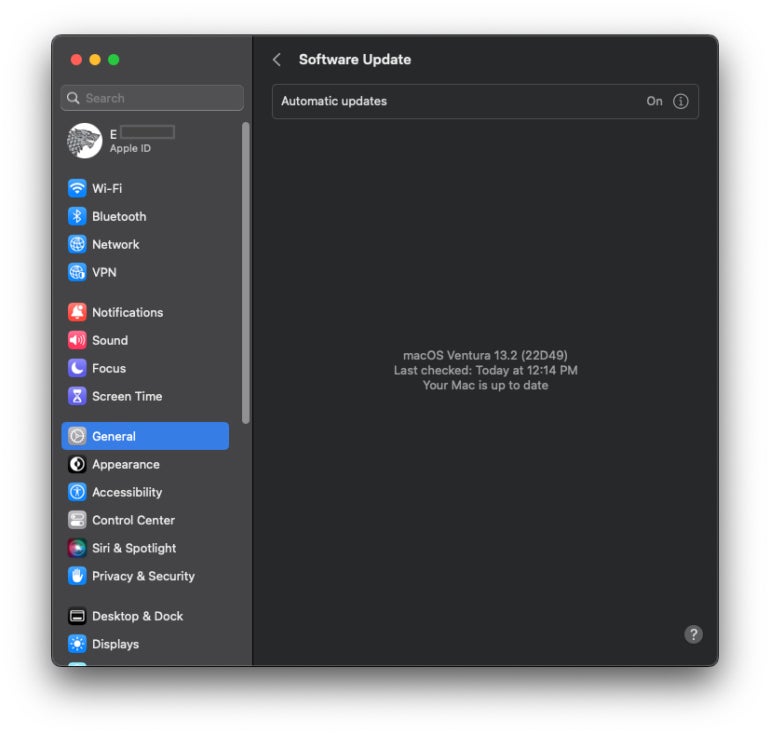
Downloading and updating macOS Ventura 13.1 didn’t resolve the challenge on my M1 MacBook Professional. macOS update 13.2 improved my Mac’s Wi-Fi reliability, but it did not completely reduce the challenge.
Disable the Apple Wireless Immediate Website link interface
Meter and UCLA have been at first amid all those reporting end users dealing with the M1/M2 macOS Ventura Wi-Fi connectivity difficulty. The prevailing steering was to disable the Apple Wireless Direct Connection interface, which was believed to contribute to the challenge. Meter even offered Terminal instructions customers could hire to disable AWDL, but other studies and my own exams indicated AWDL immediately restarts of its own accord, so that alternative does not definitely function.
Access and change macOS Wi-Fi information and facts
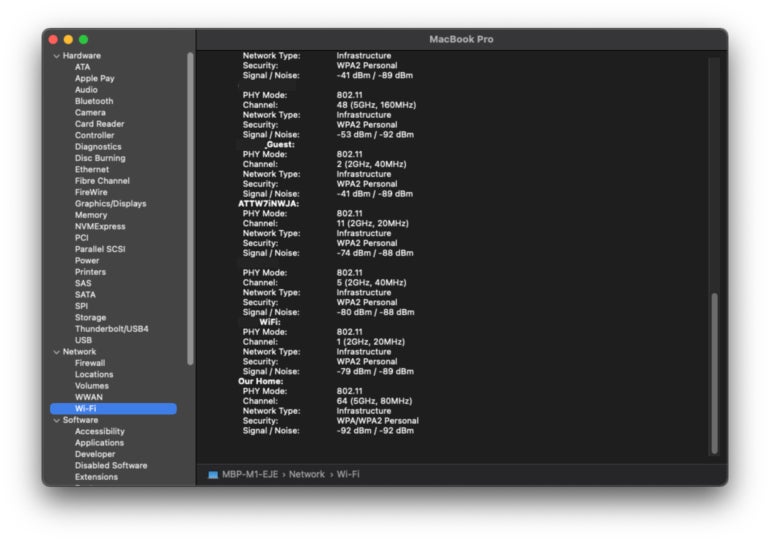
Instead, I seemed into the Mac’s Wi-Fi information. You can obtain this on your own when troubleshooting your possess Wi-Fi problems by urgent the Command and Spacebar keys at the same time, typing Process Facts and then urgent Enter. Scroll down to the Community class inside of the remaining-hand menu and emphasize Wi-Fi.
Overview the Wi-Fi network information macOS lists inside the ideal-hand pane. The procedure will specify the channel, these kinds of as 44 (5GHz, 40Mhz), as well as Signal / Sound ratios, as revealed in Figure B. The increased the ratio, the greater the signal excellent. Seek out Wi-Fi configurations that offer at least a +25dB change concerning the sign and sounds values.
Determine B
Appear also for any prospective conflicts from other wi-fi network channels and frequencies that may perhaps be bleeding over into your spot. Adjusting your Wi-Fi network’s channel correspondingly to eliminate conflicts with other close by networks ought to strengthen your wireless reliability.
Check your Wi-Fi machines far too. Downloading and installing the most up-to-date firmware updates normally helps addressing and resolving these errors. The procedure is distinctive for every product, so look at the manufacturer’s web site for the corresponding required actions.
Test the Wi-fi Diagnostics instrument
On top of that, you can operate macOS’ Wireless Diagnostics. To operate the integrated wi-fi troubleshooting utility, press the Command and Spacebar keys concurrently and then sort Wireless Diagnostics. When you push the Enter critical, the Wi-fi Diagnostics menu will show up, as demonstrated in Determine C.
Determine C
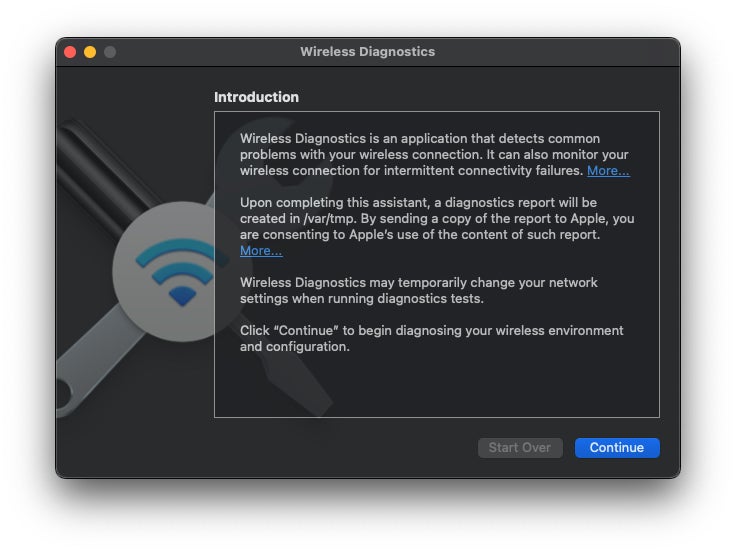
Adhere to the menu’s prompts to operate the diagnostic utility, which will watch and seize Wi-Fi traffic on the community to which you’re related. When concluded, press the Continue button and observe the remaining prompts to comprehensive the process. The utility will build a diagnostic report that provides best practice direction and added info you can use to most likely take care of community conflicts and problems.
If you are acquiring difficulty deciphering the Wi-Fi configuration specifics, or if you’re uncomfortable interpreting the results of your Wi-fi Diagnostics report, find assist from a well-informed close friend or colleague. These macOS resources are beneficial utilities that aid pinpoint challenges
Should really far more complicated troubleshooting be expected, such as by your organization’s IT team or a provider provider, the diagnostic utility also results in information inside your Mac’s /var/temp folder. These files incorporate further granular specifics for a quantity of procedures and parts that could confirm of further use isolating and resolving Wi-Fi errors.
SEE: BYOD Approval Variety (TechRepublic Top quality)
Performing Wi-Fi with macOS Ventura
In my situation, these actions settled my Wi-Fi troubles, at minimum for now, as I’m unable to replicate the trouble. I suggest adhering to the exact same steps — update macOS, ensure your Wi-Fi tools firmware is current, review your Wi-Fi network’s channels and perhaps adjust the Wi-Fi’s configuration to eradicate conflicts with other close by networks — if you’re going through related troubles.
Go through additional tutorials from Erik right here: How to resolve faults when hoping to empower Apple’s Superior Knowledge Security and how to configure Logitech G Hub program on a Mac.
[ad_2]
Supply website link If you’re having trouble connecting your Apple devices to M1 and M2 Wi-Fi networks that run on the MacOS Ventura system, here are some helpful troubleshooting techniques that can get you back online in no time.
First, make sure you’re using the latest MacOS Updates. When troubleshooting, it’s important that your system is running on the most recent version of the operating system, as this can help prevent issues related to compatibility. To check if your MacOS is up to date, click on the Apple menu and select “App Store”. If any software updates are available, you will be prompted to install them.
Next, check your router’s settings. Sometimes router settings may make it difficult to connect to M1 and M2 networks. If you’re having trouble, try factory resetting your router to its default settings. You should also check that your router is compatible with the MacOS Ventura system.
If the problem persists, you may need to repair your network settings. You can do this by opening the “Network Utility” under the “System Preferences” in MacOS. From there, you can enter the network-related commands. Alternatively, if you’re uncomfortable with entering commands manually, you can download third-party programs that will automatically repair your network settings.
Finally, reset your wireless adapter. This can help by resetting your wireless connection and can improve your connection. To do this, click the “Apple” icon and select “System Preferences”. Then, select “Network” and click the Advanced button, which will open another window. From this window, you can find the “AirPort” tab, where you should select the “TCP/IP” tab and click the “Renew DHCP Lease” button.
We hope these steps can help you get your Apple devices connected to M1 and M2 networks on the MacOS Ventura system. In the worst case, it may be necessary to contact your Internet Service Provider or Apple Support for further assistance.